In this article, I want to give you a crisp guide on the topic "How to create new custom user roles in WordPress" because this problem was often brought up in my circle of developer and content manager colleagues. Why creating custom user roles can be relevant, you will learn in the first paragraphs. However, if you are in a hurry, you can of course jump directly to the headline "Create a user role in 2 simple steps 🏆".
Why do we need user roles at all?
Everybody knows the problem: Several users with admin or editor rights use a WordPress site, but your customer, or you want the possibility to restrict the access rights of some specific users individually.
Advanced user roles access management can help
One problem I've often faced in real-world use is that downgrading specific user roles doesn't directly solve the problem, and quickly you realize that the default WordPress user roles aren't enough or can't be properly restricted individually. The downgrading of a user in the role "Admin" to "Editor" has as desired the consequence that the respective user cannot edit plug-ins or basic base website settings, but it may well be that the user is also no longer able to access certain settings of certain plug-ins, which are maybe needed for the everyday use of the content manager.
An easy to use, very well-known and useful plug-in that helps with this problem already exists and is called: "Adminimize". Adminimize is a great plug-in that can help you easily restrict or extend access rights to various functions and features for any specific role in WordPress. The reviews of the plug-in alone speak for themselves. Even though the plug-in hasn't been adjusted for a few major releases, it serves its purpose perfectly and is also more than adequate due to its simplicity in user experience. I must also note that "Adminimize" is for me one of the standard plug-ins that I use on every website of my customers.

The standard user roles are often not sufficient for larger teams
But let’s come to the next problem: If you have ever worked with a larger content team on a WordPress site, you have certainly already made the experience that the default user roles are not always sufficient. Here you might have the role of the "Editor" optimally individualized in the access rights, but other users who may need similar access corrections, too much restricted or given too many options in the WordPress admin menu. Now, before you configure more default roles, which are also limited, in their access permissions, this may already be the moment when you realize or wish: **I would like to have more custom user roles to create a custom admin menu and optimize the security of the entire WordPress site.
The plug-in solution to solve the problem
Of course, you can install another plug-in that can help you simplify the process of creating new user roles. The plug-in "User Role Editor" or similar solutions can be very helpful, but they can also lead to the fact that your database is quickly inflated and that the distribution of rights, individually created user roles, of individual users quickly become confusing when deactivating these plug-ins later.
(Recommended method)
Create a user role in 2 simple steps 🏆
My personal best practice is that we first duplicate / clone the admin user role using a custom code within functions.php. Following that, we use the "Adminimize" plugin mentioned above to restrict the rights of the newly created admin user role.
Step 1: Cloning the admin user role
To do this, we simply open our functions.php in our WordPress project and add the following function as an action call:
// CLONE ADMIN ROLE AND RENAME THIS NEW ROLE "MARKETER"
add_action('init', 'cloneExistingRole');

function cloneExistingRole()
{
    global $wp_roles;
    if ( ! isset( $wp_roles ) )
        $wp_roles = new WP_Roles();

    $admx = $wp_roles->get_role('administrator');
    $wp_roles->add_role('new_role', 'Marketer', $admx->capabilities);
}
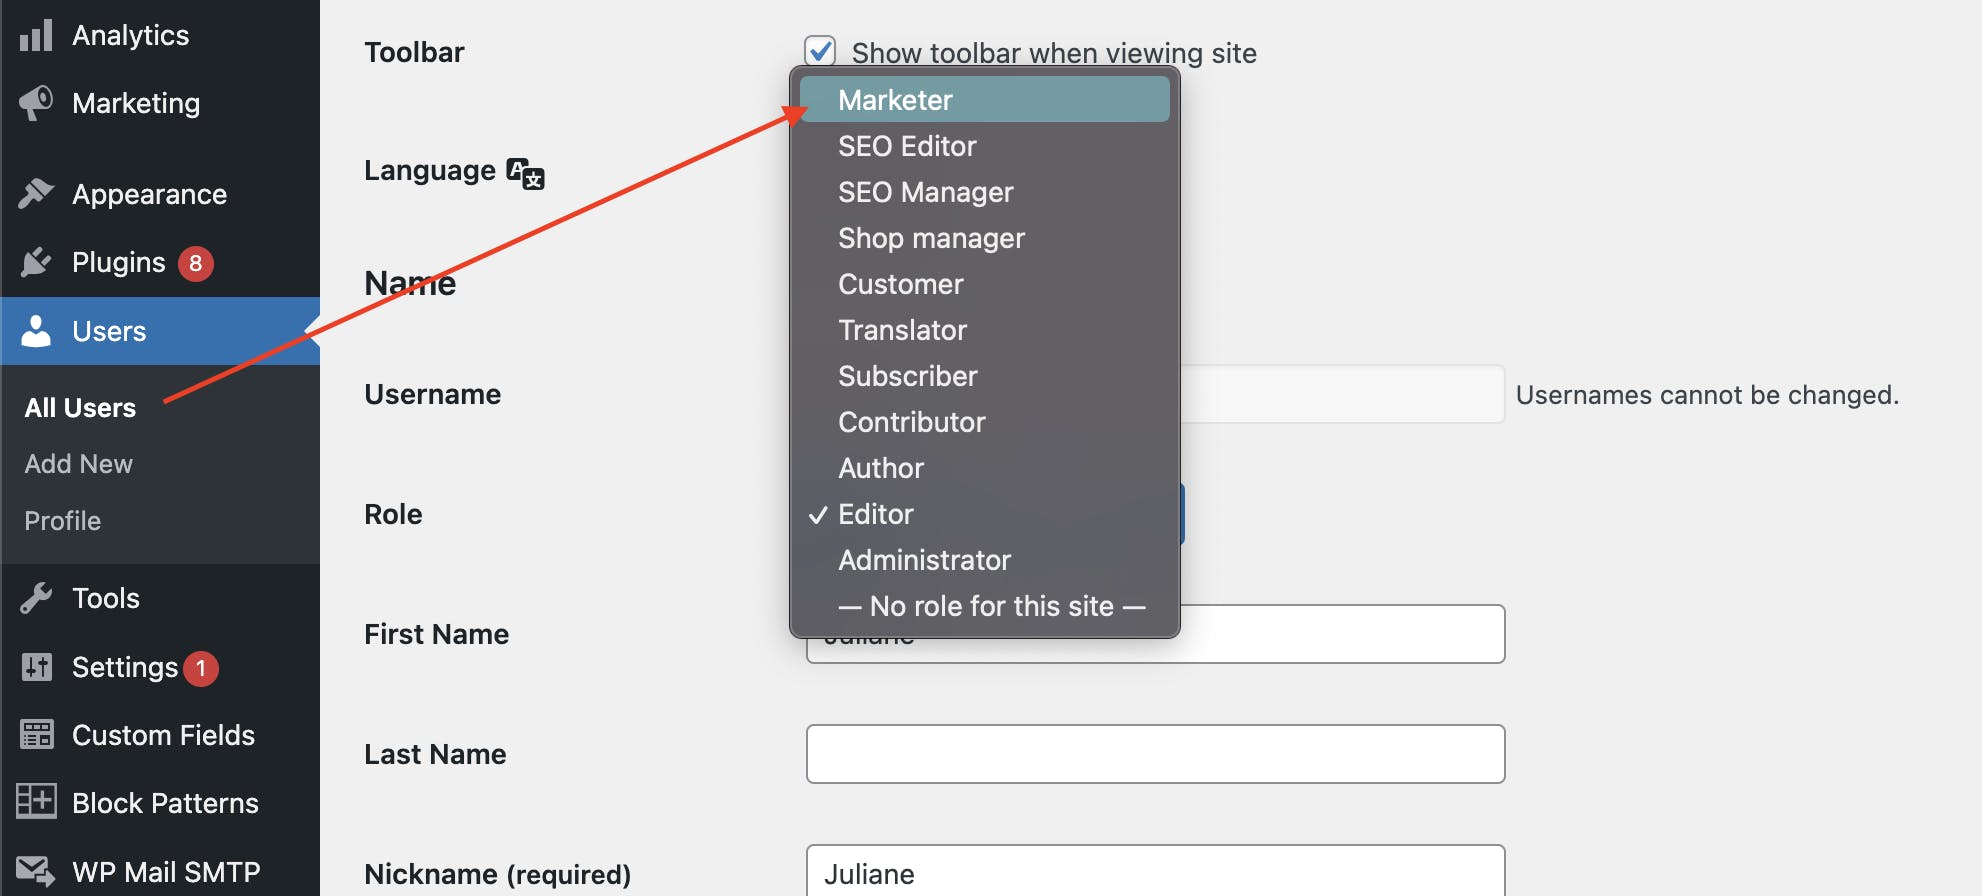
This code creates a new administrator role named "Marketer". If you want the role to be named differently, simply rename the string named "Marketer" directly in the code.
⚠️ Once you have added the code to "functions.php", you will need to call your website once in the web browser, as this function will be executed via a WordPress add_action "init" hook and after a pageload. Once you have done this, the newly created role will already be available to you in the WordPress backend. The above code, you should remove after the execution of the page reload again from the "functions.php" because this does not need to be re-executed.

Step 2: Restrict the newly created admin role with "Adminimize
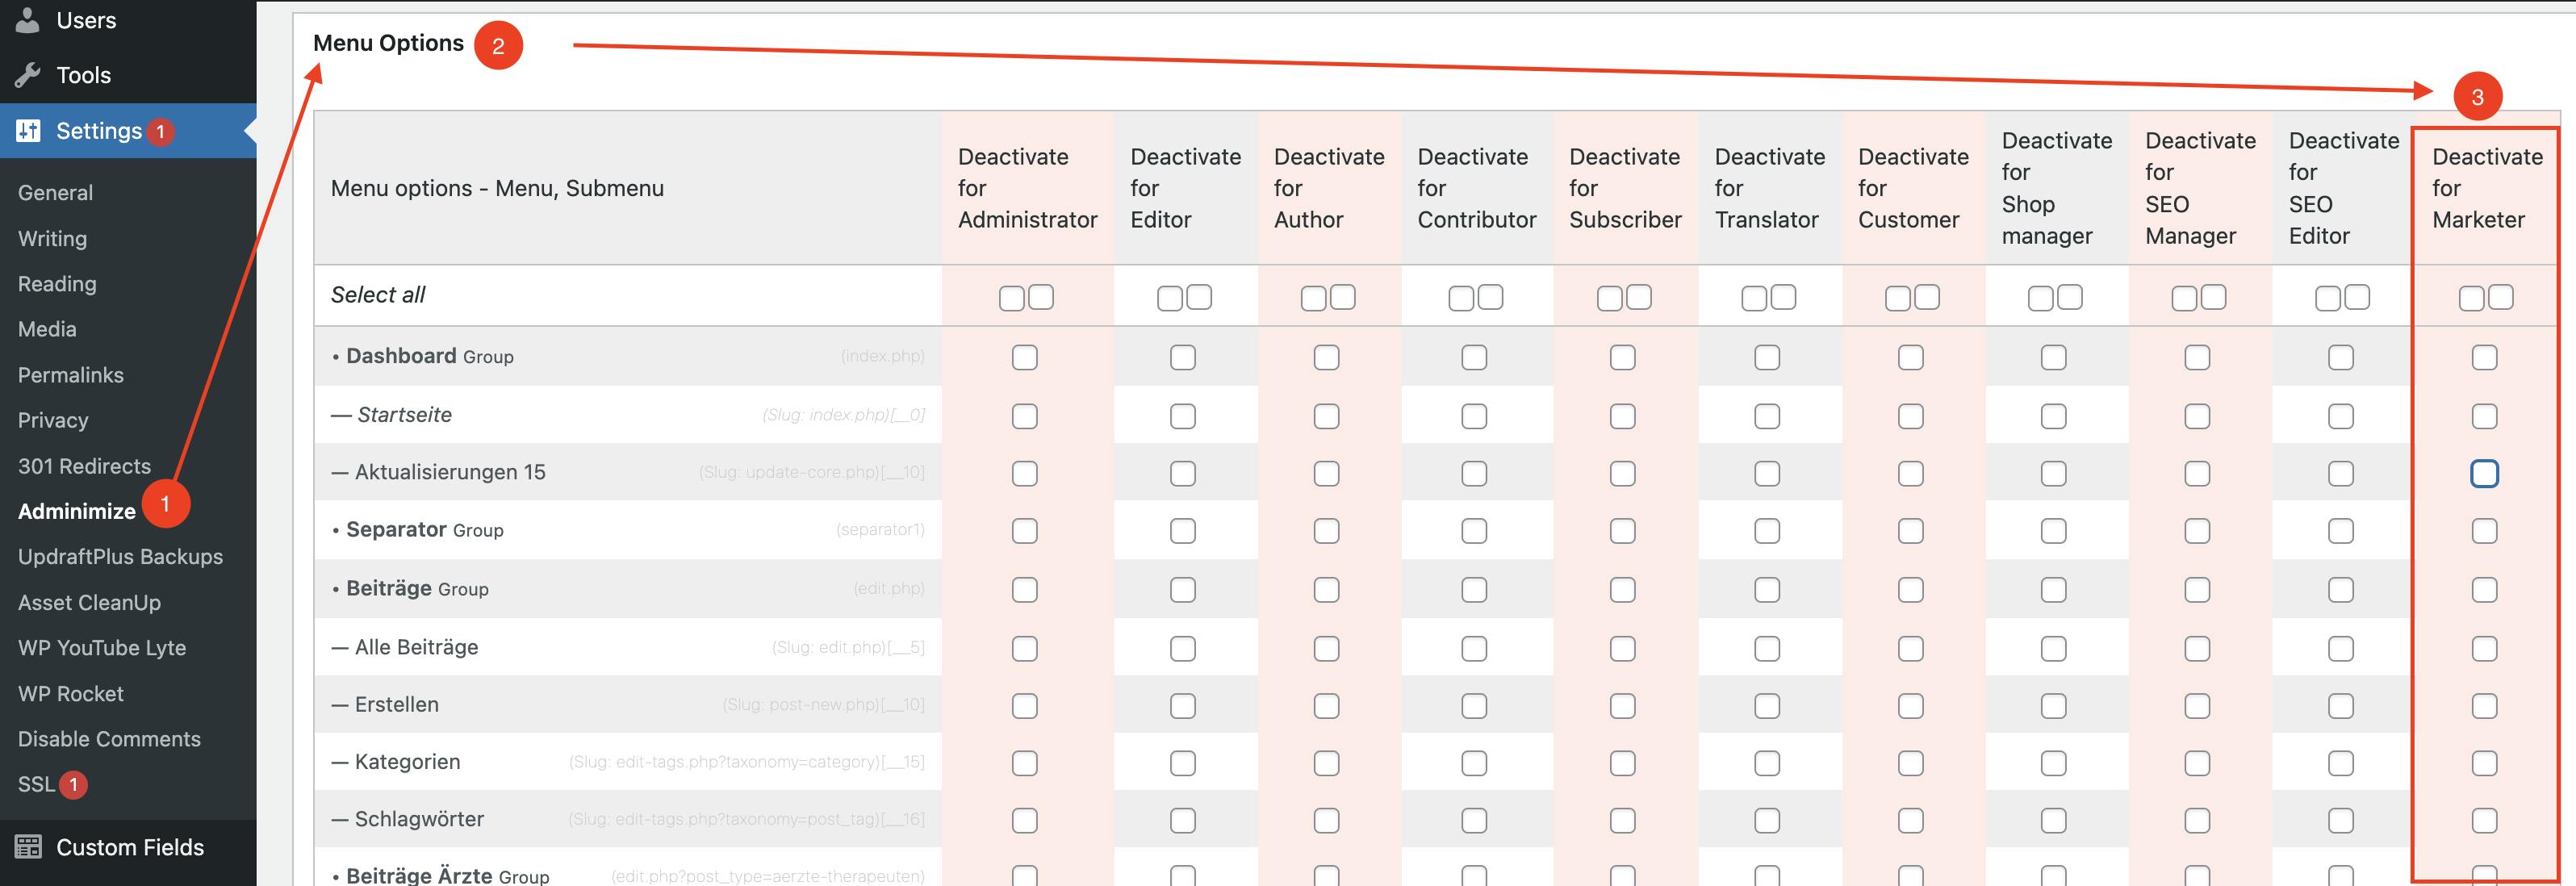
Install and activate the "Adminimize" plug-in. Navigate directly to the settings of the plug-in under "Settings > Adminimize". From here you can easily customize and restrict the rights of your newly created "Marketer" user role. This is very straightforward and convenient.

You want to delete your created user role again? 🗑
Nothing is simpler than this: if you would like to remove the user role you created, of course you can undo it.
To remove a role called "Marketer", copy the following code again into your "functions.php" and then call your website in the web browser again.
⚠️ Attention: If you want to delete another role you created, please change the
following "Marketer" string to your desired role name:
// DELETE CREATED ROLE
add_action('init', 'killExistingRole');

function killExistingRole()
{
    global $wp_roles;
    if ( ! isset( $wp_roles ) )
        $wp_roles = new WP_Roles();

    $admx = $wp_roles->get_role('administrator');
    $wp_roles->remove_role('new_role', 'Marketer', $adm->capabilities);
}
After the reload (simple page load in the browser) of your WordPress website, I recommend you to delete the code renewed from the "functions.php" so that it is not executed renewed.
Did you like this post?
Then feel free to leave me a comment or like.
This article is also available in German language 🇩🇪, you can download it here.


